Home | Glossary | Resources | Help | Contact Us | Course Map
Archival Notice
This is an archive page that is no longer being updated. It may contain outdated information and links may no longer function as originally intended.
Examination
The following preliminary steps in the examination of all firearms should be sequenced according to laboratory protocol and be documented:
- Ensure that the firearm is unloaded.
- Determine the brand and model.
- Determine caliber designation.
- Measure the bore diameter.
- Measure the chamber, if possible.
- Research the type of design.
- Determine the country of origin. (Many of the older bolt-action rifles were manufactured for various countries, each of which used a different type of military ammunition).
- Obtain the cartridge dimensions by casting the chamber, if necessary.
- Determine the action type.
- Determine the safety type.
- Determine if any modifications or alterations have been made.
(AFTE Journal can be searched by keyword) - Observe anything else unusual about the firearm.
- Note the type of sighting system and any accessories present.
- Examine the bore (interior of the barrel) and determine class characteristics (number of lands and grooves and direction of twist).
- Examine the interior of the bore to ensure it is free of projectiles.
- Check the bore for the possible presence of biological material or gunshot residues. If biological residues are present, notify the proper laboratory section.
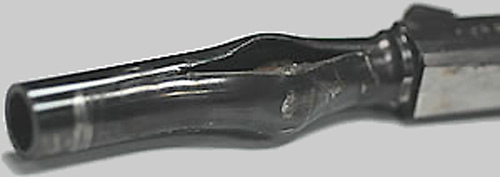
- Check for bulges or damage to the bore.
- Examine the chamber and/or forcing cone area for damage or cracking.
In addition, all firearm examinations include testing the trigger pull, the safety feature, and test firing of the mechanism.
Read a sample forensic worksheet and report - Firearms
Revolvers
Based on findings from the preliminary examination, proceed with the examination of revolvers as follows:
- Remove the cylinder (for double-action revolvers, open the cylinder).
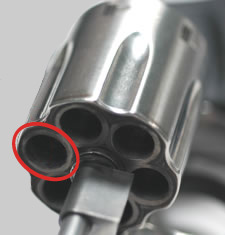
- Inspect the cylinder for damage and smoke halos (may indicate which cylinder was fired last).
- Replace (in double action, close) the cylinder and check the functionality of the cylinder stop.
- Cock the hammer until it locks and attempt to rotate the cylinder. (The cylinder stop located in the frame below the cylinder should hold the cylinder in alignment with the barrel.) Perform this check on all chambers.
- Manually hold the hammer to the rear while the cylinder stop is checked (double action only (DAO) revolvers).
- Test the trigger pull. Click to view trigger pull section.
- Test the safety functions. Click to view safety section.
- Test fire the firearm. Click to view test fire section.
See the YouTube Terms of Service and Google Privacy Policy
Additional Online Courses
- What Every First Responding Officer Should Know About DNA Evidence
- Collecting DNA Evidence at Property Crime Scenes
- DNA – A Prosecutor’s Practice Notebook
- Crime Scene and DNA Basics
- Laboratory Safety Programs
- DNA Amplification
- Population Genetics and Statistics
- Non-STR DNA Markers: SNPs, Y-STRs, LCN and mtDNA
- Firearms Examiner Training
- Forensic DNA Education for Law Enforcement Decisionmakers
- What Every Investigator and Evidence Technician Should Know About DNA Evidence
- Principles of Forensic DNA for Officers of the Court
- Law 101: Legal Guide for the Forensic Expert
- Laboratory Orientation and Testing of Body Fluids and Tissues
- DNA Extraction and Quantitation
- STR Data Analysis and Interpretation
- Communication Skills, Report Writing, and Courtroom Testimony
- Español for Law Enforcement
- Amplified DNA Product Separation for Forensic Analysts


